I am writing this small tutorial for Installing Linux on network since it was harrowing task for me so I wish some one might benefit from it
I have taken Open Suse 10.2
but the steps would rather be same for most of the distributions In case you are not willing to read the whole tutorial go to the end of it and see the check list might be that is sufficient for you and some commands are given there
-----------------------------------------------------------------------
depending on the boot sequence configured in the computer’s BIOS
The Preboot Execution Environment (in short PXE) is a protocol that enables a computer to be booted on the network.
PXE is saved in ROM on newer network cards some cheap boards do not support it ,
so before you do all this just check wether your board is capable of booting on LAN
To Start with you need
* PXE boot capable machine
* SUSE DVD or CD or ISO files.
o dhcp-
o tftp - to share the boot image
o syslinux - to supply the boot image (pxelinux.0)
Open Suse 10.2 yast2 tftp-server is the correct format do not use the "-" after yast2 instead type without first dash
yas2 tftp-server (note the presence of space and dash -)
yast2 dhcp-server
yast2 nfs-server
o yast2-tftp-server - Graphical configurator for a TFTP server (note in these commands in
o yast2-dhcp-server - Graphical configurator for a DHCP server
o yast2-nfs-server - Graphical configurator for a NFS server.
to see wether DHCP running or not type
rcdhcpd status
-------------------------------------------------------------------------------------------------
In case you don't have syslinux go to software management and install it from your DVD in case of CD it will tell u appropriate CD to use
before doing all this just check that
DHCP
TFTP
NFS
syslinux
are installed on your machine
-----------------------------------------------
You will also tell PXELINUX to boot the linux kernel we will copy from the openSUSE 10.2 DVD.
in case u dont have a TFTP directory in / then make it and then issue following command
cp /usr/share/syslinux/pxelinux.0 /tftpboot
then from Suse 10.2 DVD or first CD u can copy kernel images to boot from
cp /media/SU1020.001/boot/i386/loader/initrd /tftpboot/
cp /media/SU1020.001/boot/i386/loader/linux /tftpboot/
Then
mkdir /tftpboot/pxelinux.cfg
cd /tftpboot/pxelinux.cfg
touch default
chmod 777 default
-----------------------------------------------------------------
The boot configuration in the file default should be as follows:
default linux
label linux
kernel linux
append initrd=initrd install=nfs://IP Of SUSE TFTP SERVER/media/SU1020.001
implicit 0
display message
prompt 1
timeout 1
Note in above files I have used /media/SUSE1020.001
you need the DVD inside the DVDROM for this in case you know how to mount the ISO
you can replace with your own installation directory skip the next step if you dont know how to mount an ISO
Skip the following step if you are first time doing network boot
----------------------------------------------------------------
mount -t iso9660 /windows/E/openSUSE-10.2-GM-DVD-i386-iso/openSUSE-10.2-GM-DVD-i386.iso /install -o loop
where /install is the directory where you want to mount the ISO image and
then go to NFS server settings share this /install ( int this the ISO is already mounted you can check that)
then go to /tftpboot/pxelinux.cfg/default and here change the entry
install=nfs://IP of ur TFTP server/directory that has your ISO mounted/ (Note / at last is required
and then also you can boot this is a general process
to create your own boot menu i.e.
to install Fedora Core 5 ,Debian,Windows at the same time on different machines a file called boot.msg can be created and appropriate changes can be done but that is so confusing that I am not mentioning here
------------------------------------------------------------------------------------------
but with this configuration the dhcp server won’t know about the existence of the tftp server, so we have to add 2 the next-server and filename options. Finally the configuration should look like this:
configure the DHCP and add the following lines in it
next-server IP of TFTP server;
filename "pxelinux.0"
option domain-name ;
mydomainname;;
ddns-update-style none;
default-lease-time 14400;
subnet 192.168.0.0 netmask 255.255.255.0 {
range 192.168.0.1 192.168.0.254;
default-lease-time 14400;
max-lease-time 172800;
next-server 192.168.0.1;
filename "pxelinux.0";
}
--------------------------------------------------------------------------------------
Sample dhcp.conf where TFTP server IP is 44
option domain-name "IPG2004";
option domain-name-servers 192.168.0.44, 192.168.0.44;
option routers 192.168.0.44;
ddns-update-style none;
default-lease-time 14400;
subnet 192.168.0.0 netmask 255.255.255.0 {
range 192.168.0.1 192.168.0.254;
default-lease-time 14400;
max-lease-time 172800;
next-server 192.168.0.44;
filename "pxelinux.0";
}
------------------------------------------------------------------------------------------------
Sample "default" file in directory /tftpboot/pxelinux.cfg
default linux
label linux
kernel linux
append initrd=initrd install=nfs://192.168.0.44/install/
implicit 0
display Hi This is Tapas Linux
prompt 1
timeout 1
------------------------------------------------------------------------------------
In case any thing goes wrong
1) check syslinux was installed to check type as root
#rpm -q syslinux
the output would tell wether syslinux was there or not
2)the client machine should be enabled in BIOS to boot from Network press F12 or F10 to boot from Lan if you see a DHCP request on your machine then the DHCP server is up and running
3)check DHCP server is on and running
4)check TFTP server in xinetd services is running or not
5)check NFS entries in which file has been exported is it the same as the files in installation DVD
6 )check the IP of your DHCP and TFTP server in
/etc/dhcp.conf and /tftpboot/pxelinux.cfg/default
also check the file nams specified
7)check the image that you have mounted is at having chmod 777 permissions in /install directory
8) in case you are using a firewall and you are a newbie then it is better you disable the firewall expert people might check the iptables to see they have allowed above services
9) In case you are getting non graphical screen to install on client machine that means that ROM on your Lan card does not have enough memory to support graphical installation
or the entries in NFS server on the TFTP machine or DHCP or NFS where ever is your exported directory are in suscpicion
Important Links to be read
Tuesday, August 21, 2007
Tuesday, August 7, 2007
disable the hidden administrative share
You can disable the automatic administrative share creation via Group Policy, but this is a much simpler way:
In order to disable these shares permanently, a registry edit will be necessary.
HKEY_LOCAL_MACHINE\SYSTEM\CurrentControlSet\Services\LanManServer\Parameters
create AutoShareServer AutoShareWks both REG_DWORD Value: 0
The default-hidden shares are:
-
C$ D$ E$ - Root of each partition. For a Windows NT workstation/W2K/2003/XP Professional computer only members of the Administrators or Backup Operators group can connect to these shared folders. For a Windows NT Server/W2K Server computer, members of the Server Operators group can also connect to these shared folders.
-
ADMIN$ - %SYSTEMROOT% This share is used by the system during any remote administration of a computer. The path of this resource is always the path to the W2K/NT system root (the directory in which W2K/NT is installed usually C:\Winnt and in XP it's C:\Windows).
-
FAX$ - On W2K Server, this used by fax clients in the process of sending a fax. The shared folder temporarily caches files and accesses cover pages stored on the server.
-
IPC$ - Temporary connections between servers using named pipes essential for communication between programs. It is used during remote administration of a computer and when viewing a computer's shared resources. This share can be very dangerous and can be used to extract large amounts of information about your network, even by an anonymous account.
-
NetLogon - This share is used by the Net Logon service of a W2K, 2003 and NT Server computer while processing domain logon requests, and by Pre-W2K computers when running logon scripts.
-
PRINT$ - %SYSTEMROOT%\SYSTEM32\SPOOL\DRIVERS Used during remote administration of printers.
IM (instant messaging) to IRC clients
IM (instant messaging) to IRC clients
BitlBee brings IM (instant messaging) to IRC clients. It's a great solution for people who have an IRC client running all the time and don't want to run an additional MSN/AIM/whatever client.
http://bitlbee.org/main.php/news.r.html
BitlBee brings IM (instant messaging) to IRC clients. It's a great solution for people who have an IRC client running all the time and don't want to run an additional MSN/AIM/whatever client.
http://bitlbee.org/main.php/news.r.html
Sunday, August 5, 2007
Sholay
*Gabbar: "Session chhey aur programmer teen. Bahoot naainsaafi hai." [logout
- logout - logout]. *
*"Haan ab theek hai... ab tera kya hoga" Kaalia?" *
*Kaalia: "Sarkaar, maine aapka code likha tha."
Gabbar: "To ab documentation kar! *
*The End.........** *
- logout - logout]. *
*"Haan ab theek hai... ab tera kya hoga" Kaalia?" *
*Kaalia: "Sarkaar, maine aapka code likha tha."
Gabbar: "To ab documentation kar! *
*The End.........** *
Friday, August 3, 2007
Download and save Shockwave Flash swf files from the web browser to your hard disk using Firefox or Internet Explorer
1. Saving Flash files from Firefox
Firefox for Newbies
a. Click Tools - Page Info
b. Click the Media Tab on the Page Info Windows
c. The media tab has a complete list (with preview) of Images, CSS Files and Shockwave Flash files that were downloaded by the Firefox browser while rendering (loading) the page.
d. Scroll down the list and locate the swf file.
e. Click the "Save As" button. Select some directory on your hard drive and save the file (No need for a third-party plug-in)
Firefox for Geeks and Power Users
a. Type about:blank in the Firefox address bar
b. Now click List cache entries or directly type about:cache?device=disk (Disk cache device)
c. Press Ctrl+F and try to location the flash file by typing some part of website URL or the flash file name or just .swf. After some hit and trial, you should be able to locate the swf file URL
d. Click the SWF URL to open the Cache Entry Information page. Right click on the link and choose "Save link as"
 2. How to save flash in IE browser
a. Click Tools - Internet Options
b. In the General Tab, click the Settings button available in the Temporary Internet Files group.
c. Click View Files to open your Temporary Internet Files folder. Depending upon your IE settings, the Temp. folder can contain tens of thousands of files.
d. Click View - Details. Now click View - Arrange Icons By - Internet Address. Depending upon the webpage, there could one or more Flash files (Shockwave Flash Object) under the Inernet Address.
e. Once you find the right flash file, right-click and choose Copy. Then paste the swf file in any other directory. Be sure to
keep the page and IE open to avoid purging of the cache file.
For newbies, I suggest the following approaches:
1. Get a download accelerator like Flashget and tell it to automatically download the shockwave extention (*.swf)
2. Or download a free IE plug-in for saving flash files.
3. How to save Flash files from Opera browser
Just like IE, Opera stores the flash files in the browser cache.
4. Save flash in MyIE2
Either follow the exact procedure for Internet explorer or download the free Flash saver MyIE2 plugin.
Firefox for Newbies
a. Click Tools - Page Info
b. Click the Media Tab on the Page Info Windows
c. The media tab has a complete list (with preview) of Images, CSS Files and Shockwave Flash files that were downloaded by the Firefox browser while rendering (loading) the page.
d. Scroll down the list and locate the swf file.
e. Click the "Save As" button. Select some directory on your hard drive and save the file (No need for a third-party plug-in)
Firefox for Geeks and Power Users
a. Type about:blank in the Firefox address bar
b. Now click List cache entries or directly type about:cache?device=disk (Disk cache device)
c. Press Ctrl+F and try to location the flash file by typing some part of website URL or the flash file name or just .swf. After some hit and trial, you should be able to locate the swf file URL
d. Click the SWF URL to open the Cache Entry Information page. Right click on the link and choose "Save link as"
2. How to save flash in IE browsera. Click Tools - Internet Options
b. In the General Tab, click the Settings button available in the Temporary Internet Files group.
c. Click View Files to open your Temporary Internet Files folder. Depending upon your IE settings, the Temp. folder can contain tens of thousands of files.
d. Click View - Details. Now click View - Arrange Icons By - Internet Address. Depending upon the webpage, there could one or more Flash files (Shockwave Flash Object) under the Inernet Address.
e. Once you find the right flash file, right-click and choose Copy. Then paste the swf file in any other directory. Be sure to
keep the page and IE open to avoid purging of the cache file.
For newbies, I suggest the following approaches:
1. Get a download accelerator like Flashget and tell it to automatically download the shockwave extention (*.swf)
2. Or download a free IE plug-in for saving flash files.
3. How to save Flash files from Opera browser
Just like IE, Opera stores the flash files in the browser cache.
4. Save flash in MyIE2
Either follow the exact procedure for Internet explorer or download the free Flash saver MyIE2 plugin.
Thursday, August 2, 2007
bypass orkut filters
Ever thought of orkutting on your mobile. How if you can orkut while travelling by bus, train .etc! well, All you need is :-
- a GPRS enabled mobile phone
- an active internet connection (Mobile Office in case of Airtel) and
- mobile application opera mini.
If you try to open www.orkut.com on mobile it fails due to either design of the site or limitations for support of javascript in opera mini. Even orkut says-
Currently, orkut.com isn’t compatible with mobile devices. To access your orkut profile, please try logging in using your computer’s web browser.
But the truth is... I've been orkutting on my mobile for past few months with opera mini using this link. Since the link address is too long, for convenience add, rupeshmandal.googlepages.com/mobileorkut (note: without www) as bookmark.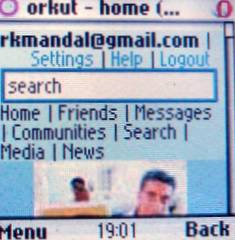
Previously, i was able to check scrapbook/communities, delete scraps and search but was unable to scrap someone... But recently unplugged showed some tricks to do so. though they are tedious, they do the job.
 Note:- make sure you bookmark them correctly else they won't work.

Previously, i was able to check scrapbook/communities, delete scraps and search but was unable to scrap someone... But recently unplugged showed some tricks to do so. though they are tedious, they do the job.
 Note:- make sure you bookmark them correctly else they won't work.
 1. To scrap
add a bookmark with name scrap@orkut or anything and address
add a bookmark with name scrap@orkut or anything and address
javascript:{document.forms[1].action += "&Action.submit=";document.forms[1].submit();}
or
javascript:submitForm(document.getElementById('b2'),'submit');
Now each time you want to scrap someone, go to his/her scrapbook... type the message in the message box (on pressing ok the page tries to load.. you can press cancel .. no problem!)
Now, open the bookmark scrap@orkut. It will post your scrap in the background. you can check out by reloading your friend's scrapbook.
2. Reply from your own scrapbook
add a bookmark with name reply@orkut with address
javascript:{ for (var i = 1; i<=10;i++) { if (document.getElementById("scrapText_" + i).value != "") { document.getElementById("b" + (i*3 +1)).onclick();break;} } }
Now to reply from your own scrapbook, type the message in reply message box and open this bookmark.
3. Sending Message
add a bookmark named as message@orkut with address
javascript:submitForm(document.getElementById('b1'),'submit');
4. Adding a friend
add a bookmark named addfriend@orkut with address
javascript:submitForm(document.getElementById('b1'),'yes');
and open it when asked for confirmation while adding a friend.
5. Joining community
bookmark
javascript:submitForm(document.getElementById('b1'),'join');
with name joincommunity@orkut
open this bookmark when it asks for confirmation.
As i've said earlier, these procedures are quite tedious but they work no doubt. Hope that things will be easier in near future.
unblocking websites
Opera provides a free online tool called Opera Mini Simulator that emulates the Opera mobile phone browser on your desktop computer. The tool is done in java and is quite popular among web designers for testing website layouts on mobile phone devices without actually using a mobile phone.
As you probably guessed it by now, this Opera Browser Simulator can also be used for accessing web pages that may be blocked on your computer. Since the requests are made via the Opera.com website, they would easily bypass the local filtering.
To open any site in Opera, just append that site address to the following URL and start browsing.
http://www.operamini.com/demo/?url=[URL] - example
The Opera Simulator can even be used for secure sites that require cookies - for instance, you can check your Hotmail emails via Opera. Though you are restricted to the tiny 200x200 screen of Opera simulator, it's still a very handy tool. [Opera link
Is anyone else reading your email ?
Is your boss or even some coworker secretly reading your email ? Are the Federal agencies snooping your email messages ? Following are two simple techniques that can help you confirm your suspicion - it detects snoopers and can track the address of the computer that is watching your email.
Remember that for steps 3 & 4, you can create a free account on geocities.com, create a dummy HTML file that contains Statcounter or Google Analytics tracking script.
1. Set up a Hotmail account in US and and a second email account with a non-U.S. provider. (eg. Rediff.com or IndiaTimes.com)
2. Send messages between the two email accounts which might be interesting to the email snooper or NSA who may be monitoring your email.
3. In each message, include a unique URL to a Web server (link to the dummy file on geocities.com containing the tracking code) that you have access to its server logs. This URL should only be known by you and not linked to from any other Web page. The text of the message should encourage an NSA monitor or email snooper to visit the URL.
4. If the server log file ever shows this URL being accessed, then you know that you are being snooped on. The IP address of the access can also provide clues about who is doing the snooping.
The other technique uses Google Analytics for tracking the email impressions.
1. Create an email email message such that Urchin with the following HTML code to embed the __utm.gif image anywhere in your email message.

The email impressions would be credited to the source "news1" and the medium "email". As soon as someone ones your email, the impression will be registered on Google Analytics server as the gif file is downloaded on the spying computer.
2. If the email recipient has disabled automatic downloading of internet images, you can create a campaign link to track the email referrals. Tag these links using the utm_ campaign variables.
Continuing with the example above of an email message which you track using the source "news1" and the medium "email," your tagged link might look like this:
< href="www.mywebsite.com/?utm_source=news1&utm_medium=email">
Update: According to NYT, the volume of information gathered from telephone and Internet communications by the National Security Agency without court-approved warrants was much larger than the White House has acknowledged.
Americans come to the program's attention only if they have received a call or e-mail message from a person overseas who is already suspected to be a member of certain terrorist groups or linked somehow to a member of such groups. And the agency still gets a warrant to intercept their calls or e-mail messages to other people in the United States.
Source: | Who is snooping on my email? - confirm if one's email messages are being read by someone else.
Remember that for steps 3 & 4, you can create a free account on geocities.com, create a dummy HTML file that contains Statcounter or Google Analytics tracking script.
1. Set up a Hotmail account in US and and a second email account with a non-U.S. provider. (eg. Rediff.com or IndiaTimes.com)
2. Send messages between the two email accounts which might be interesting to the email snooper or NSA who may be monitoring your email.
3. In each message, include a unique URL to a Web server (link to the dummy file on geocities.com containing the tracking code) that you have access to its server logs. This URL should only be known by you and not linked to from any other Web page. The text of the message should encourage an NSA monitor or email snooper to visit the URL.
4. If the server log file ever shows this URL being accessed, then you know that you are being snooped on. The IP address of the access can also provide clues about who is doing the snooping.
The other technique uses Google Analytics for tracking the email impressions.
1. Create an email email message such that Urchin with the following HTML code to embed the __utm.gif image anywhere in your email message.
The email impressions would be credited to the source "news1" and the medium "email". As soon as someone ones your email, the impression will be registered on Google Analytics server as the gif file is downloaded on the spying computer.
2. If the email recipient has disabled automatic downloading of internet images, you can create a campaign link to track the email referrals. Tag these links using the utm_ campaign variables.
Continuing with the example above of an email message which you track using the source "news1" and the medium "email," your tagged link might look like this:
< href="www.mywebsite.com/?utm_source=news1&utm_medium=email">
Update: According to NYT, the volume of information gathered from telephone and Internet communications by the National Security Agency without court-approved warrants was much larger than the White House has acknowledged.
Americans come to the program's attention only if they have received a call or e-mail message from a person overseas who is already suspected to be a member of certain terrorist groups or linked somehow to a member of such groups. And the agency still gets a warrant to intercept their calls or e-mail messages to other people in the United States.
Source: | Who is snooping on my email? - confirm if one's email messages are being read by someone else.
Useful Windows XP DOS Commands & Tricks
To view help at the command-line, at the command prompt, type the following:
CommandName /?
Quick tip - Drag to avoid typing: When your command acts on a file or folder, you must type the path to that folder after the command. You can save typing time by dragging the file or folder from Windows Explorer into the command window.
find - advanced file search with filter
fc - Free BeyondCompare in XP
FC is an advanced DOS Command that compares two files and displays the differences between them. Though the file comparison results are not as interactive as BeyondCompare or Altova DiffDog, fc is still very useful. You can even set fc to resynchronize the files after finding a mismatch.
type - open text files sans Notepad
Similar to Unix cat command, Type is my favorite DOS command for displaying the contents of a text files without modifying them. When used in combination with more switch, type splits the contents of lengthy text files into multiple pages. Avoid using the type command with binary files or you'll hear alien PC beeps and see some greek characters on your PC.
Related resources on Microsoft Website:
http://www.microsoft.com/resources/documentation/windows/xp/all/proddocs/en-us/ntcmds.mspx?mfr=true
http://www.microsoft.com/resources/documentation/windows/xp/all/proddocs/en-us/assoc.mspx?mfr=true
Disabling Recent Documents History
- Windows XP includes a feature that keeps track of all recent documents you have opened or used. The idea is that you can select Start/Recent Documents History and quickly reopen any document you have recently used. I use many documents each day and never use the feature myself. In my opinion, I can keep up with what I want to use without Windows XP doing it for me.
The bad thing about Recent Documents History is that Windows XP has to calculate what should be put there each time you boot Windows, which can slow things down. So, if you never use the Recent Documents History, it's a good idea to disable it. Here's how:
1. Open the Registry Editor (select Start/Run, type regedit, and click OK).
2. Navigate to HKEY_CURRENT_USER\Software\Microsoft\Windows\ CurrentVersion\Policies\Explorer.
3. Create a NoRecentDocsHistory D_WORD key. Double-click the value to open it once it is created.
4. Set the Data Value to 1 to enable the restriction.
5. Click OK and close the Registry Editor. You'll need to restart the computer for the change to take effect.
Subscribe to:
Posts (Atom)